CONTACT PHOTO AND VIDEO

Photo and Video (formally Digital Photographer) is published by Photo and Video Media and written and edited by professional photographers and videographers. To contact us, or for information on how to submit photos, videos, or articles please submit the form at right.

Or send an email to: info@photovideomagazine.com


123 Street Avenue, City Town, 99999

(123) 555-6789

email@address.com


You can set your address, phone number, email and site description in the settings tab.
Link to read me page with more information.

Digital Photographer

The go-to source for photo enthusiasts

Filtering by Tag: Tips

Fashion Photography: Tips from a Fashion Week Pro

digital photographer

photo: Jamie Beck / From Me To You

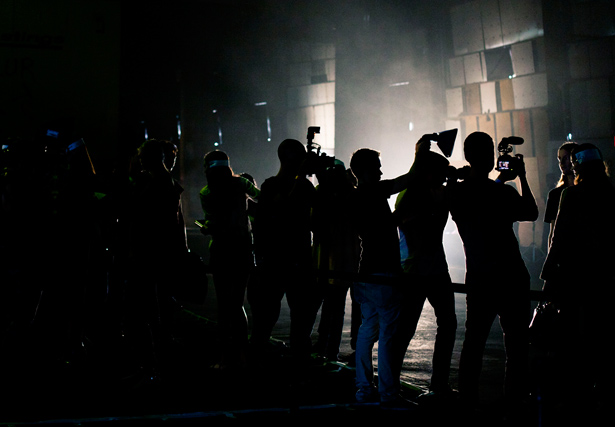
"When I first started there were 6-7 photogs shooting the shows. Vogue, WWD, NYT, the top publications. Before you had to be with a magazine or newspaper but now it has changed," Condé Nast photographer Robert Mitra tells New York-based photographer Jamie Beck in a great interview on Beck's site, From Me To You, about the realities of working the Fashion Week "pit" for 25 years.

If you follow fashion week photography, you know that saying "it has changed" is an understatement. These days, everyone from solo street style bloggers to online publications big and small are firing off photos of the runways and the beautiful people in the front rows from New York Fashion Week all the way through the final shows in Paris. And of course they're doing so on DSLRs and iPhones alike, with Instagram shots uploaded in real time often serving as the public's first views of the collections.

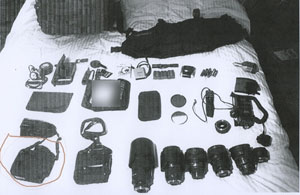
In the behind the scenes interview, Mitra lists his gear of choice (Canon 1D Mark IV, 70-200mm lens, monopod) in addition to sharing his tips for capturing candid backstage shots of the models and discussing why he shoots JPG rather than RAW. Check out the full interview on From Me To You.

Scent-o-graphy: How to Make Scratch-and-Sniff Photos

digital photographer

I've been a fan of Photojojo's off-beat photo DIYs for a while now, but their recent tutorial for making scented photographs might be the most obscure way of getting shutterbugs to interact with their shots that I've ever seen. But hey, if photography is meant to capture a moment in time, then why not also include the other sensory elements of that moment?

The three techniques given by Photojojo for making aromatic shots are: Print A Whiff---in which you pay a service to make your photo scratch-and-sniff (okay, not so "DIY," but still rad); Just Sniff, No Scratch---in which you marinate your print in a homemade scent (bonus points if the scent corresponds to the subject of the photo, like, say, a flower or a wet dog); Essential Oil Scenting---which isn't so very different from the second process except that it seems easier. Check out the full tutorial here.

So, what do you think? Will you make scratch-and-sniff photos? Do you even print your shots after you take them?

(Photojojo via Apartment Therapy)

Food Photography: Advice & Inspiration from a Food-Shooting Pro

digital photographer

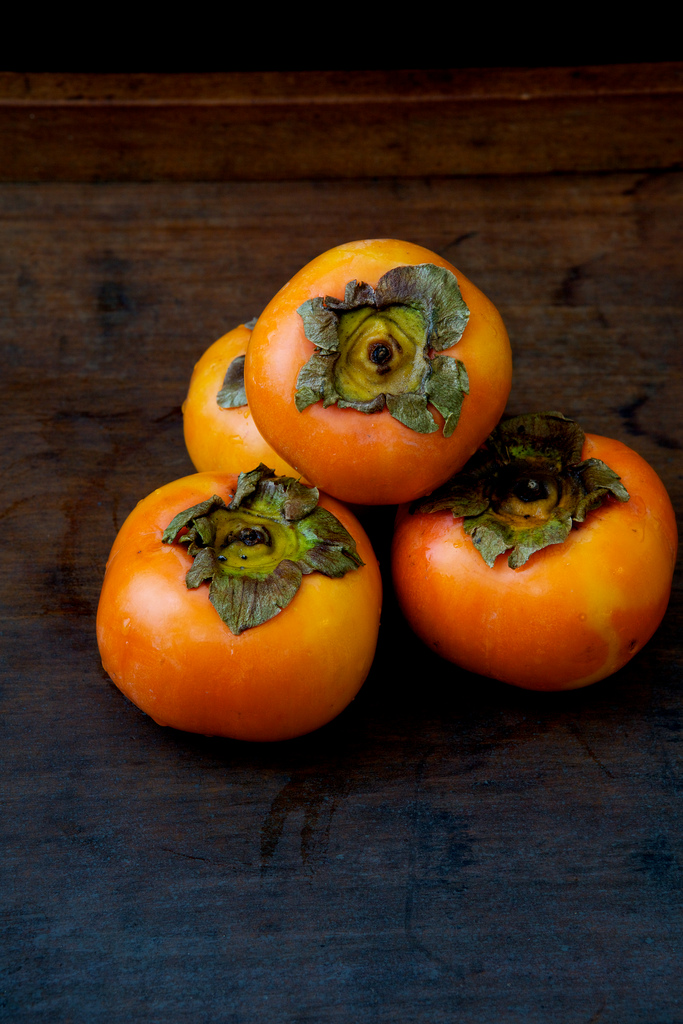
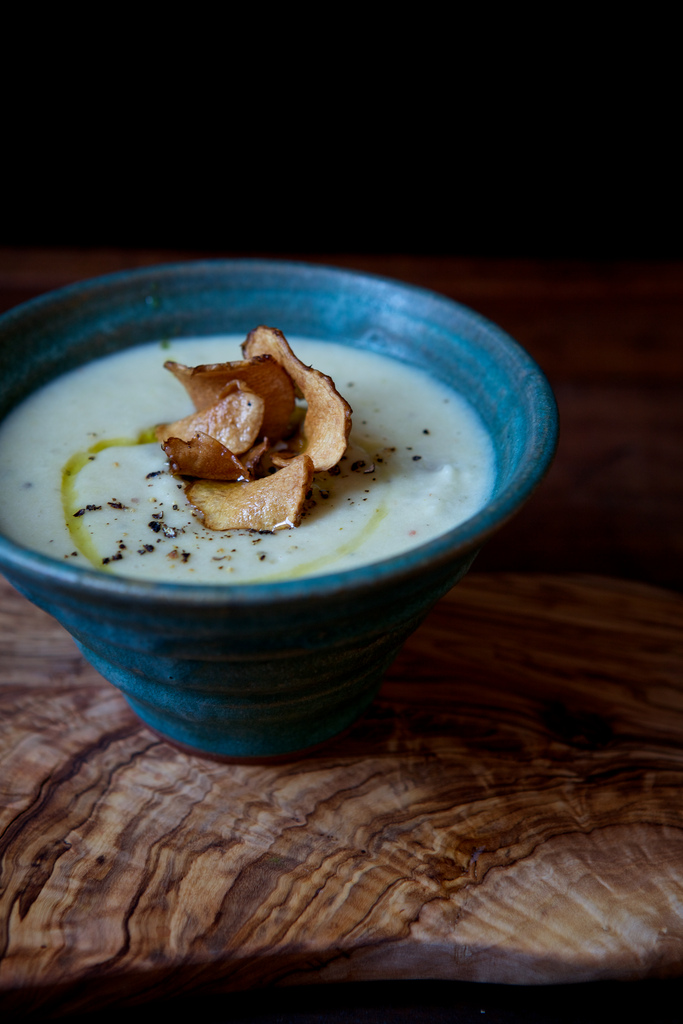
all images © Nicole Franzen


Thanks to photo apps like Instagram, and to our current culture of capture-and-overshare enthusiasm, I can no longer sit down to a meal without snapping a photo of the food. If you take a look at the various tags on Instagram related to the things that people consume throughout the day (#food #eats #noms) you'll see that I am not alone in the habitual photographing of my meals.

But outside of the realm of iPhonography, there is also a thriving professional food photography world. Yes, this is an actual job that many fortunate (and talented!) folks have managed to carve out for themselves. While some great cooking glossies have gone by the wayside (RIP Gourmet), there is no shortage of outlets for professional photographers to showcase (and cash in on) their work online and in print.

Culinary Composition
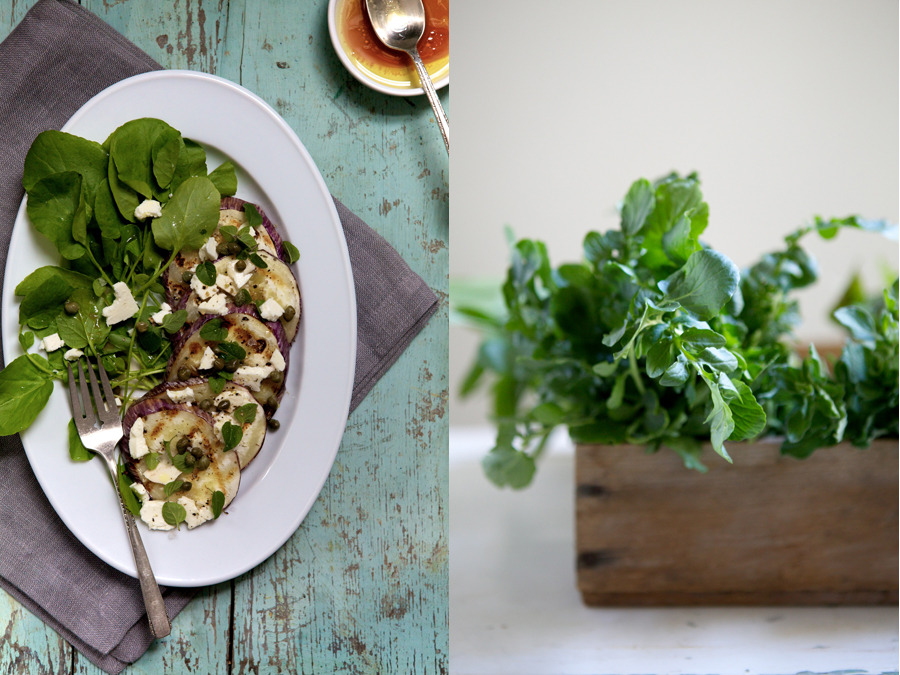
Professional food photographers may make their deliciously-staged shots look simple, but the craft of capturing food is no easy feat. Even someone well versed in the other genres of photography will have to relearn the rules when shooting subjects as fickle as couscous or cheeseburgers. And reflective subjects like glasses full of bubbly can offer significant challenges in improper lighting.

So with those sorts of challenges in mind, I've asked Brooklyn-based food photographer, Nicole Franzen, to share her tips for shooting food, including advice on equipment, lighting, styling and composition. Nicole runs the gorgeous food and lifestyle blog, La Buena Vida, and her photo clients include Bon Appétit, Edible Manhattan and Edible Brooklyn Magazines, and Gramercy Tavern, among many others.

Below are Nicole's tips on the craft of photographing food. Grab a fork and dig in!
click thumbnails to enlarge


Equipment: "You can create a great at-home studio with a low budget by using materials like foam core poster board, which comes with a reversible black/white side. This versatility is great for creating shadows or for bouncing light. Also, I use clamps from a hardware store for everything, including holding up poster boards or hanging fabrics . A tripod is an important piece of equipment. While I love free shooting, a tripod is essential for low-light conditions."

Lighting: "I prefer to use all natural light. So for this, shooting near a window is the way to go. It's fun to play with light: draw your curtains, bounce light from above or the side, and move around. Think about how you want the food to look. Is the scene dark and moody? Bright and warm? Depending on the season, the light will change; go with it and embrace it. In winter months I shoot darker and in summer the scenes are more colorful. As a rule of thumb, it's best to shoot in the morning and late afternoon, when the light is softer. Don't be fooled into thinking that when it's sunny outside it's the best time to shoot. Cloudy days often end up creating the best lighting conditions---a natural diffuser for the sun, which creates a beautiful soft light. Shooting outside is fantastic also. Sunny days make for harsh contrast, so use a diffuser when needed."

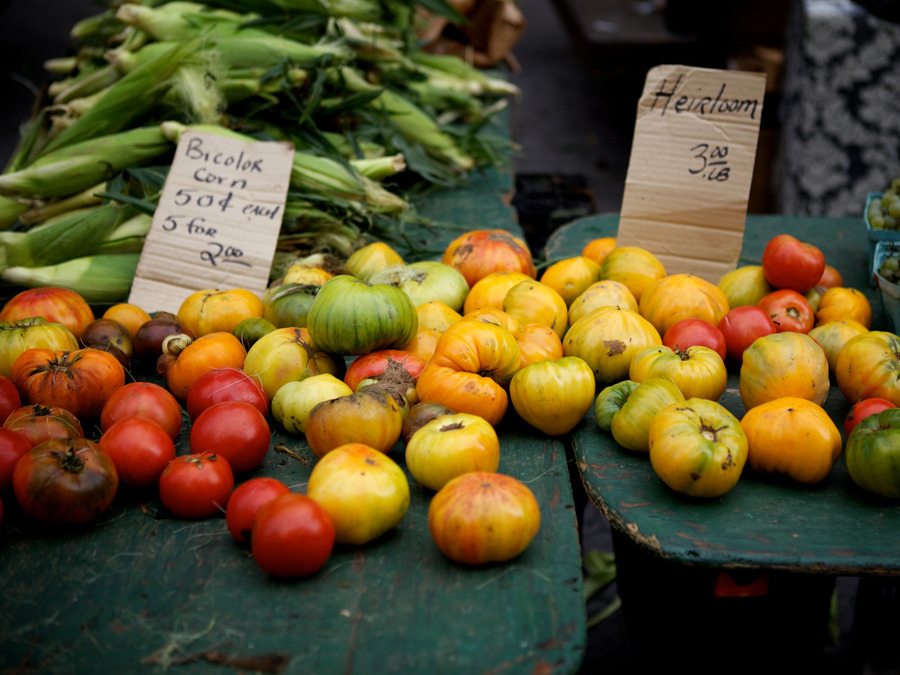
Styling: "I like to keep styling pretty simple. I think the food should be the star. I regularly frequent flea markets, second hand stores and markets, and I am always on the look out for new surfaces on which to shoot because they set the tone of the photo. I use everything from old fruit crates, which can easily be disguised as a table top, to old baking sheets, galvanized metals, distressed cutting boards and wood, and an assortment of fabrics. I use simple fabrics, linen being my favorite. You can pop into your local fabric store and pick up things like muslin, cheesecloth, burlap and other natural fibers. Even dying them yourself saves money and allows you to create they exact feel you're going for. I also recommend collecting an assortment of plates and vintage flatware to style shoots. Keep it simple overall---less is more."

Composition: "The composition element of a photograph is really important, and I believe it's one of those things you learn from doing. For food, I often like to shoot from above. But even though this is my go-to, I still like to move around and try different angles for capturing the scene. You might try some up close, some further away. Always ask where the image is going. If it's going to be a small image for a website, try and get the food up close. If they are going to be larger images you can shoot the food from further away. In the end, all I can say is try to make it feel real, not forced."

Creating a Platform
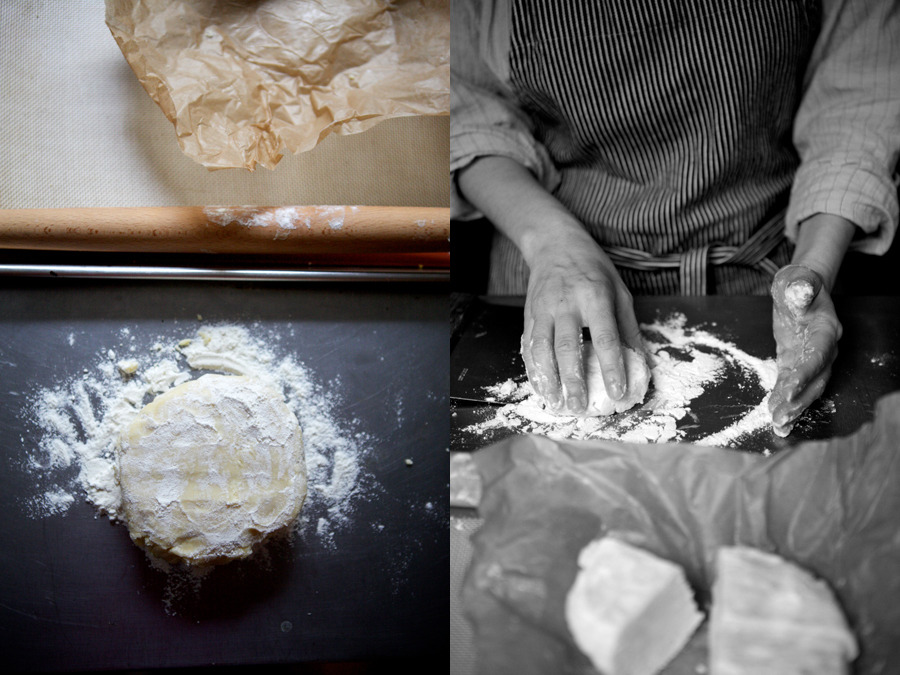
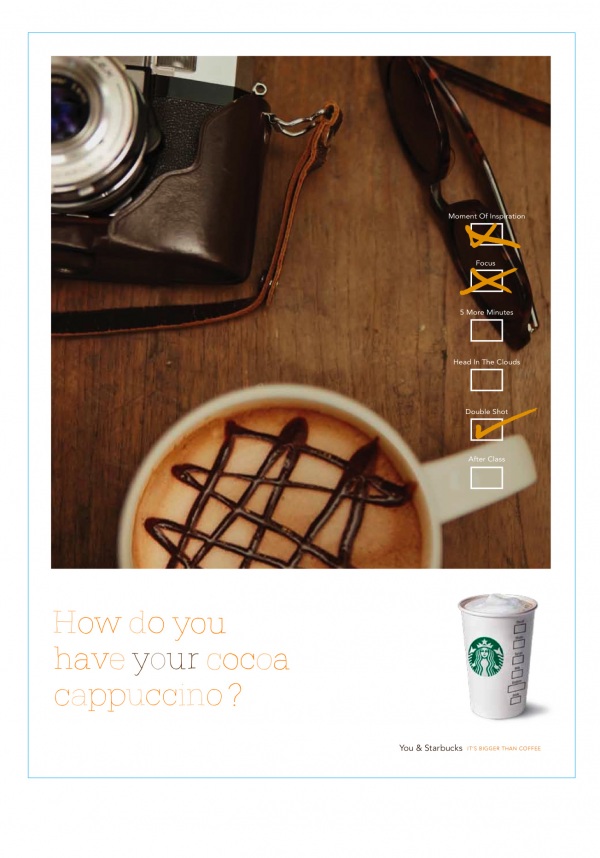
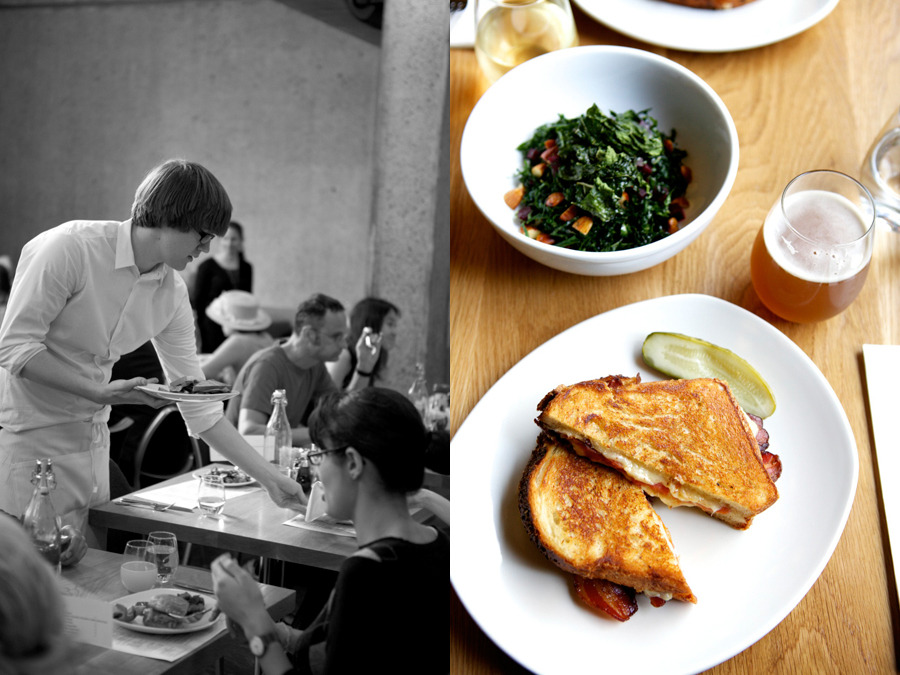
Making beautiful photos is not all that it takes to become a working shutterbug, however. As I've shared before on DP, I'm inspired by stories like this one about London (and now New York)-based photographer, Brian Ferry, who as a result of demonstrating a clear talent for capturing dining experiences on his photo blog, The Blue Hour, was hired by Starbucks to shoot a big campaign for the brand. Similarly, Nicole Franzen created a platform for herself to show off her food photography and styling chops through La Buena Vida, and has in turn gone on to shoot foodie editorials for major publications and capture close-ups for highly respected restaurants. These two photographers have different aesthetic approaches but the one thing that unites them is that their images show a strong point of view. Nicole was, again, kind enough to share her somewhat unconventional journey to professional status and give advice on starting the journey of becoming a food photographer. Check out more of her tips below.
click thumbnails to enlarge


Training: "I will start by saying that I had no proper training in the photography world. I am a full-fledged hands-on learner. Whenever I would try to read books about technique, the information would rarely stick. I had to learn through doing. It took years of practice and an undying love for taking photographs. It took always pushing forward and challenging myself. I feel that, as with most arts, it comes from a deep source within. Learning the technical side of things just helps you get that feeling out. Everyday I spend a large amount of time looking at things that inspire me. Whether it be another photographer's work, a stylist I envy, or mother nature. My main source of inspiration comes from nature itself. It has given us all of these beautiful things for free: texture, light, mood. It's important to take the time to appreciate that. Some of my favorite subjects to shoot are farmer's markets and rural farms. I love the organic feel of these settings and I try to represent that in my photos. For me, it's all about getting to the root of food and all the amazing people involved."

Promotion: "The journey has been a roller coaster ride of emotions. It's not easy becoming a full time photographer, but after lots of hard work it has started to pay off. I've always had a camera in my hand and have always loved to take walks. Many of us photographers are familiar these walks and treasure them deeply. It's our time. After working my way through every genre of photography, it finally made sense that food was my true niche. I had been obsessed with food and cooking since a very young age, and so it only was a matter of time before I combined the two. The last two years I have spent all of my time devoted to learning about photographing food. I started a blog, which was my initial way of introducing my work to the world. I started by photographing my own meals. It then continued to grow and grow. I've met almost every client I have through the internet and referrals. Get to know everyone in the industry and build relationships. Be persistent and consistent. Social media has helped us photographers a lot---embrace that. You will be surprised when the emails start to come in."

Business: "Running a small photography business has its challenges. I am constantly learning as I go. I've become a jack of all trades---not only are you doing the photography, you are doing book keeping, invoicing, and all the other details that are involved in running a small business. I make mistakes, and then I learn from them. Every day I feel blessed that I am able to do what I love. I was never destined for a desk job. The best thing about photography is that it's always changing: new clients, new experiences and new shoots. My only words of advice are follow your heart, keep on working hard and always challenge yourself to get better."

Tools: Nicole primarily shoots with a Canon 5D Mark II and edits in both Aperture and Photoshop.


Visit nicolefranzen.com to view more inspiring images. Thank you, Nicole!
 

Flickr Announces Geofences: Privacy for Geotagged Photos

digital photographer

Flickr has just announced a new privacy feature for geotagged photos, called Geofences. Over 300 million photos and videos have been geotagged by Flickr members so far, and the engineers wanted to make managing privacy of these geotagged shots easier for the community. Instances in which you might want to conceal your photo's location include: shots taken at home or at the private residence of someone else whose exact location you don't feel comfortable broadcasting to the world at large. According to one Flickr engineer, who helped develop the new feature, "Geofences are special locations that deserve their own geo privacy settings. Simply draw a circle on a map, choose a geo privacy setting for that area, and you’re done. Existing photos in that location are updated with your new setting, and any time you geotag a photo in that area, it gets that setting too." This saves the photographer the hassle of tweaking default geo settings every time she uploads media taken in a location she has deemed private.

Read all about Geofences, from the inception of the idea to the technical details on the Code: Flickr Developer Blog.

(via Flickr)

Make Your Camera Kid-Proof with Sugru

digital photographer

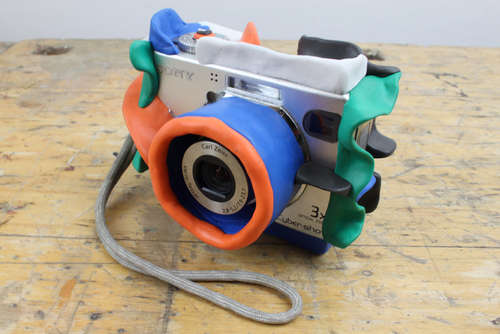
Chances are, if you have young children, you've experienced the odd gadget drop at the hands of your well-meaning but not entirely coordinated little one. Chances are also very good that the gadget in question was a digital camera---because cameras are fun and you love to encourage your budding shutterbugs in their behind the lens talents. Well, the geniuses over at Instructables have come up with an easy and fun preemptive measure for this very situation: the awesome bouncy kids camera made with sugru. Go ahead, DIY to your heart's desire and let the kids keep snapping away!

(via ohdeedoh, via Instructables)

Justice: Photographer Recovers $9K Stolen Camera & Equipment Thanks to GadgetTrak

digital photographer

It's every professional photographer's worst nightmare to have his/her camera and gear stolen. Unfortunately, that's exactly what happened to pro shutterbug John Heller while on assignment for Getty Images at the Egyptian Theater in Hollywood, when $9,000 worth of gear was stolen from him--- including his Nikon D3 DSLR. After filing a police report and all but resigning himself to the loss, Heller decided a few months ago to do a search for his camera on GadgetTrak’s Camera Serial Search (which is a free service). According to GadgetTrak, "Heller entered the serial number of his stolen camera and found an exact match with several images that were recently posted to Flickr." Through a pretty fascinating series of events thanks to the embedded serial number in the uploaded images, the stolen property was ultimately recovered.

(via GadgetTrak)

Why Photographers Should Have a Strong Online Presence

digital photographer

image via The Blue Hour


If you are looking to make money off your photography, I suggest you read this recent success story, which was written by London-based photographer, Brian Ferry---creator of the gorgeous photo blog, The Blue Hour. After reading, you will be inspired---if you haven't already---to make a focused effort of creating an online brand and identity for yourself as a photographer.

The success starts, of course, with great images. But in order for those images to be noticed, the photographer has to come out from behind the viewfinder and show off a little. The thing about Brian's blog is that it is stacked with great captures but it is also somewhat personal---tracking the photographer's travels and daily life in London. He presents an inviting persona through his photo essays, and clearly Starbucks took notice. Congrats to Brian. Here's hoping the same kind of story is in your own future! If something similar has happened to you, let us know in the comments. We'd love to hear of your successes.


How-To: Capturing Action & Motion

Lynne Eodice

Capturing Action & Motion Text and Photos by Lynne Eodice

There are several ways to express motion in your photos—ranging from freezing the motion with a very fast shutter speed to panning along with your subject using a slower shutter speed. You can also express a feeling of motion by slowing down your shutter speed to intentionally blur your subject.

Freezing Action

Action Mode (left), Shutter Priority Mode- 1/1000 second (right); click images to enlarge

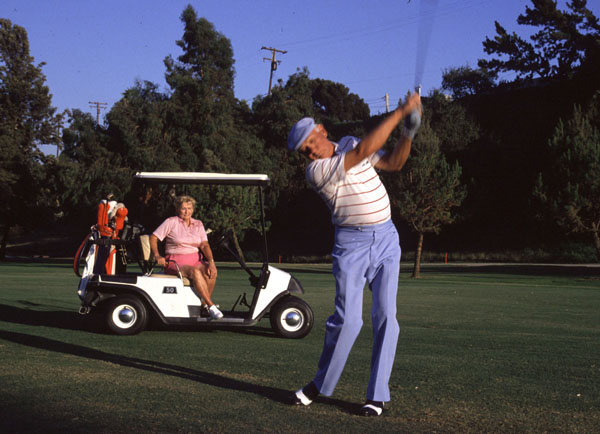
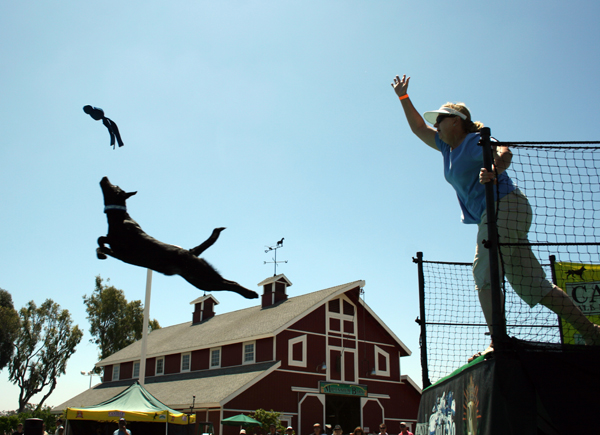
In order to give an image a stop-action look, you’ll either need to use your camera’s sports/action mode (indicated by the running figure on the basic shooting mode dial), or your shutter-priority mode to set a fast shutter speed. In this mode, denoted by the Tv (time value) or S (shutter) mode on your shooting dial, you set the desired shutter speed and your camera will automatically set the aperture to get the best exposure. By using a shutter speed of at least 1/500—and especially at 1/1000 to 1/5000 second—you can freeze nearly all activities, including those that happen too quickly to be perceived by the human eye. A person will appear to be suspended in mid-air, while water droplets seem frozen in space. You’ll also need good lighting in order to freeze motion, so it’s best to shoot these images in a well-lit interior venue or on a sunny day. I also advise using an ISO setting of at least 400 to help stop action as well.

A good stop-action photo requires a little planning. If you know the path that your subject will follow (e.g., a race horse running around the track), you should determine your vantage point in advance so that you can concentrate on capturing the moment. Fast shutter speeds relieve worries about camera movement, but it’s also important that you anticipate the moment of peak action that you want to freeze. Try to press the shutter button a split-second before that moment occurs. In most of today’s digital cameras, you can also set your auto focusing mode to continuously focus on moving subjects. And in the sports/action mode, you’ll get continuous shooting (at least 3 frames per second) when you hold the shutter button down. This will boost your chances for success in getting a great stop-action photo.

Panning

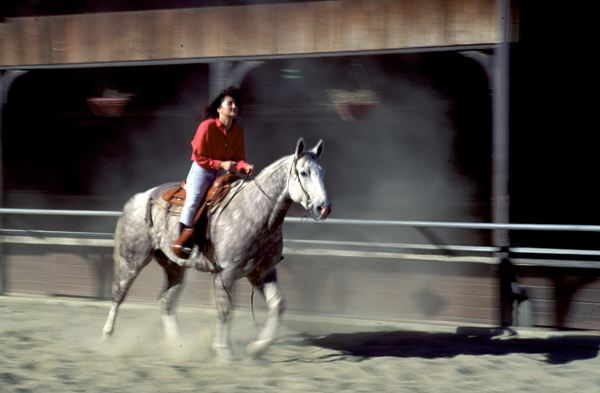
Panning- 1/30 second ; click image to enlarge

This is another highly effective way of portraying a sense of motion when photographing a moving subject—you’ll follow the subject with your camera during an exposure. If this is done properly, you’ll get a relatively sharp subject against a very blurred background. The subject will rarely be entirely sharp, though, and some blurring of the subject can heighten the feeling of motion.  In order to get this effect, you’ll want to use your camera’s shutter priority mode and set it for a slow shutter speed. Settings of 1/15 or 1/30 second will enable you to handhold the camera during an exposure. If you’re using your camera’s basic shooting modes, you can often get a somewhat slower shutter speed with the landscape mode. Although it is designed to give you great depth of field when photographing landscapes, this mode will also utilize a somewhat slower shutter speed. Longer exposures work well on cloudy days or in the shade. In order to prevent overexposure with slow shutter speeds on a sunny day, you may want to use a neutral-density (ND) filter, which lets less light through the lens. This will enable you to get longer exposures in bright light.

Panning shots should also be planned. Choose subjects that are fairly well separated from their backgrounds. When shooting, timing and smooth camera movement is crucial for a successful panning photo. Start following your subject before you release the shutter and continue to follow it until after you hear the shutter click. And rather than moving just your head and shoulders, rotate your entire body in an even, graceful motion. Panning takes practice! You’ll find that no two pictures are alike, and some will definitely be better than others.

Motion Blur

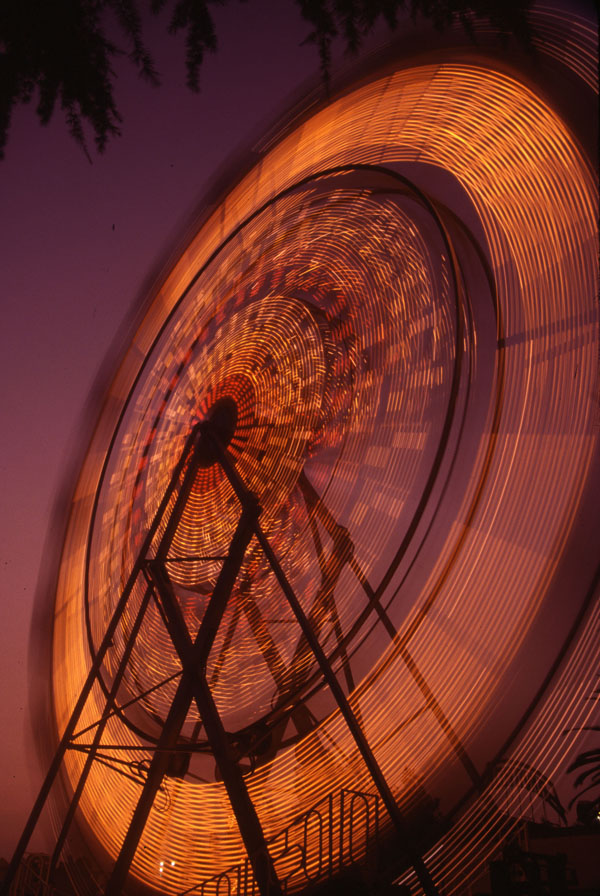
Motion Blur- 1 second (left), Motion Blur- 3 second (right); click images to enlarge

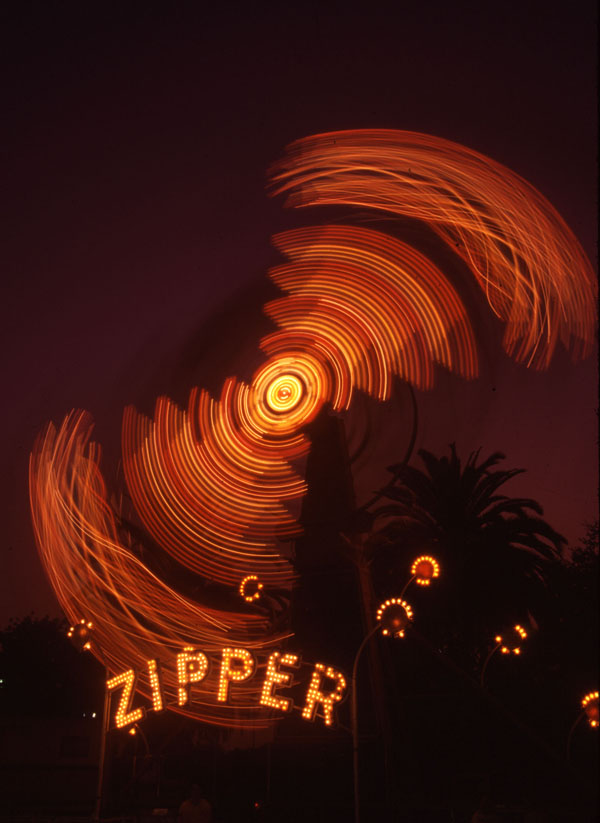
One of the most exciting ways to portray movement in a photograph is to allow a moving object to become blurred. This approximates the way that our eyes perceive a fast-moving object. To record a moving subject as a blur, you must use your camera’s shutter priority mode to set a slow shutter speed, but the exact slowness depends on several factors, such as the speed of the subject. For example, a Ferris wheel in motion at dusk can be blurred at a shutter speed of at least 1/30 second. Also, a subject passing across your field of view blurs more quickly than one headed straight toward you.

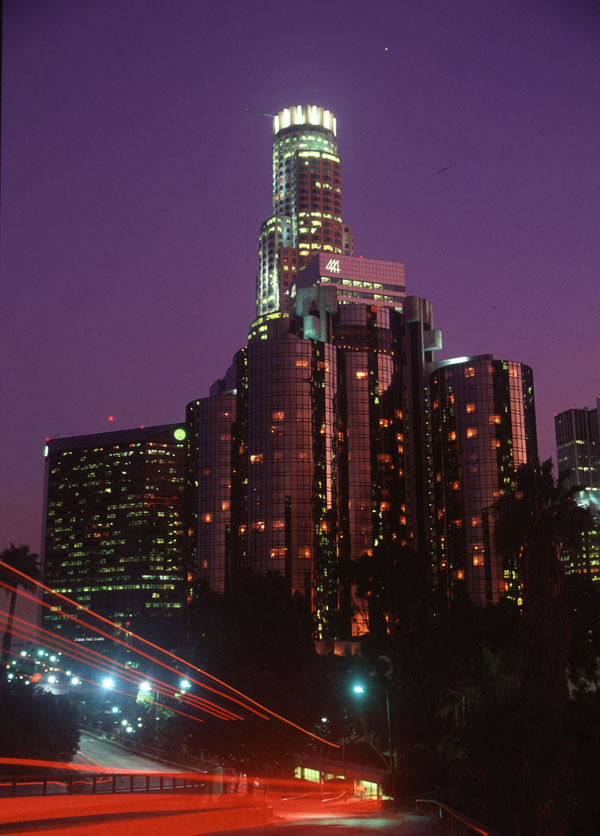
When using slow shutter speeds at night, a camera can record patterns of moving lights that can’t be seen by the eye. Cars and amusement park rides are excellent subjects for this technique. To capture the blur of moving lights, it’s best to set up a tripod at a location where you can get a great view of your subject, and where the ambient light is not too strong. You’ll be using long shutter speeds of about 5 seconds on up to about a minute.

Experiment!

Just as with sports, action photos taken with fast or slow shutter speeds take practice. So experiment with a variety of shutter speeds and exposure combinations – and above all, have fun.


How-To: Getting the Right Exposure

Lynne Eodice

How-To: Getting the Right Exposure

Text and Photos by Lynne Eodice

One of the most important issues you should address before shooting a picture is setting the exposure. First of all, a good exposure is one that captures the overall tonal range (the range of dark through light tones) that is visible to you before you click the shutter. What you’re trying to do is to capture an image that shows light tones, dark tones and everything in between. When you create a good exposure, it means that you’re giving your camera’s sensor the right amount of light to record your subject’s tones correctly.

Put quite simply, good exposure is the amount of light that it takes to record a scene correctly onto your camera’s sensor. If you give the sensor too much light, your picture will be overexposed. The image may appear washed out and lacking in detail in the brightest areas. If there’s too little light, the image will be underexposed and will look dark and dingy. So in most cases, you’ll want to capture an image that’s neither too dark nor too bright, but just right.

Some subjects are easy to expose correctly. When a scene is well lit and has an average tonal range (with nothing being too dark or too light) and the light is fairly even, getting a good exposure is a pretty simple process. Your camera’s built-in automatic exposure does a good job of recording subjects like this correctly. But the more complex your subject is in terms of light and dark tones, the more challenging proper exposure can become. For example, you need to know how your camera’s meter will react to a beautiful snow-covered landscape—and what you need to do to record that snow the right way.

Eighteen-Percent Gray

Click thumbnails to enlarge images

You’ve probably heard this terminology relative to photography, but what does it really mean? Here’s the lowdown: All in-camera metering systems are designed to read tones in a scene as 18-percent gray (or a medium gray value). The reason for this is that this tone is midway between pure black and pure white. And it doesn’t matter what color your subject is or what lighting illuminates it—your meter will usually give you a recommended exposure that records your subject as a medium tone.

When you photograph a predominately white or black subject, the white may turn out darker and the black may be lighter. This is because your camera wants to expose them as medium gray. A black horse may appear to be gray, while a beautiful snow scene may also appear gray. By finding an actual mid tone in a scene that you want to shoot and reading it correctly in an image, you’ll establish the exposure for all the other tones in that scene. By establishing this tone as the middle range, the brighter areas will record as whites and the darker areas will record as dark grays and black. The reason this works so well is because the objects in a scene are of different values and won’t expose on the sensor the same way.

Exposure Compensation

Exposure Compensation +/- 1 for overly bright and dark scenes Click thumbnails to enlarge images

Exposure becomes a little more complicated when you’re photographing larger areas of bright or dark tones. This is why large areas of white snow often turn out gray. In order for the snow to be record as white, you have to add some additional exposure, usually via your camera’s exposure-compensation feature, denoted by the +/- button on your camera. Exposure compensation is a method of fine-tuning the exposure of a scene by compensating for overly bright or dark areas.

It’s important to recognize when a particular subject could fool your camera’s meter, and how to meter for best results. Generally speaking, any time your predominant subject area is darker or lighter than a mid tone, the meter could be fooled into under or over-exposing your image.

Your camera’s exposure-compensation feature lets you add or subtract exposure from the metered exposure. This is done in one-third stop increments up to a maximum of three stops in either direction, depending on your DSLR. Once it’s set, this compensation will be applied to each frame until you set it back to zero. Knowing how much compensation to use is usually a matter of experience.

Auto-Exposure Bracketing

This is like having an insurance policy for your images. It’s similar to exposure compensation in that it changes the exposure to a pre-defined level, but when you set auto-exposure bracketing and you shoot an image, the camera will automatically shoot one (or more) at the metered setting, and one at the set amount of overexposure and one at the same amount of underexposure. To program auto-exposure bracketing, you just tell the camera how many frames you want to shoot and how many stops (or fractions of a stop) difference you want between each frame.

You’ll get three images (or perhaps more, depending on your camera), one with the as-metered exposure, then one underexposed by say, a ½-stop, and one overexposed by a ½-stop, depending on how you’ve set your camera. Later on, when you’re viewing these images on your computer, you can decide which exposure works best. Auto-exposure bracketing is a great tool for learning how various exposures will affect the same subject. Even when you have more experience, you can utilize it in very demanding lighting situations.

How-To: Understanding & Applying Depth of Field

Lynne Eodice

How-To: Understanding & Applying Depth of Field Text and Photos by Lynne Eodice

Depth of field is the zone in your photograph that’s in sharp focus in front of and behind your main subject, and which has a profound effect on the way your images look. Here are two essential terms to know:

• Shallow depth of field — Characterized by a blurred background and/or foreground.

• Great depth of field — Denoted by overall image sharpness.

Three factors that determine DOF

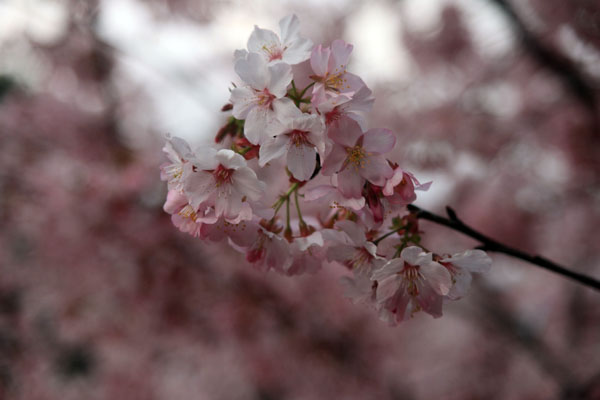
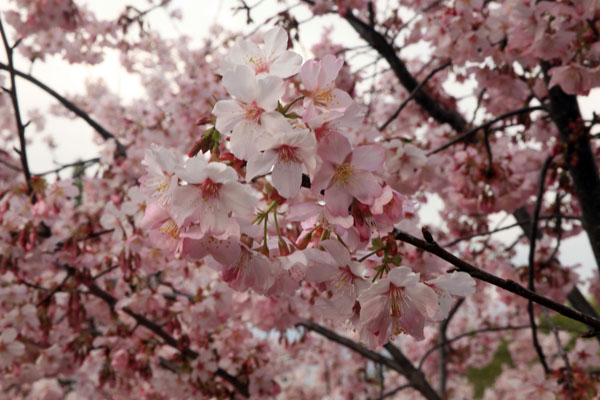
Shallow DOF vs Great DOF: Cherry blossoms at f/4.5 and f/29 Click images to enlarge

First of all, your camera’s aperture setting plays a critical role in depth of field. The smaller the aperture setting, the greater the depth of field. Although it may seem somewhat counter-intuitive, a small aperture is a large f-number on your aperture dial (such as f/8, f/11, f/16, f/22 and so on), while a wide aperture is a small f-number such as f/2.8, f/3.5, f/4.5 or f/5.6). It’s easier to grasp this concept if you think of these numbers as being part of a pie: A fourth of a pie (f/4) is much larger than a sixteenth of a pie (f/16).

At f/16, most “normal” focal-length lenses (in the 35mm to 40mm range for most digital cameras) that are focused on a subject 12 feet away will render everything sharp from about 5.5 feet in front of the camera to infinity. At f/2.8, only the subject will be sharp; both the foreground and background will be blurred. Midway in-between at f/5.6, you’ll only get sharpness from about 3.5 feet in front of the subject to eight feet beyond it.

Secondly, subject distance affects depth of field. Generally, the closer your subject, the shallower the depth of field. Even at f/16, if you focus on a subject that’s three feet away with a lens in the normal range, the depth of field will be less than a foot. At f/2.8, your subject’s eyes may be in focus while the nose and ears are blurred. Conversely, when you back away from a subject the depth of field increases. With an aperture of f/16 at six feet, the zone of sharpness will extend from about a foot in front of the subject to about three feet behind it.

And finally, the focal length of your lens plays a role in your depth of field. The more magnification (the longer the focal length of the lens), the less depth of field you’ll have at any distance and aperture. Conversely, you’ll get greater depth of field with a wide-angle focal length at any given aperture. So if you’re shooting a scene at an aperture of f/8, for example, you’ll get greater depth of field when using a 16mm focal length than you would with a 35mm focal length, which would give you greater depth of field than a 100mm focal length.

Choosing Between Shallow and Great DOF

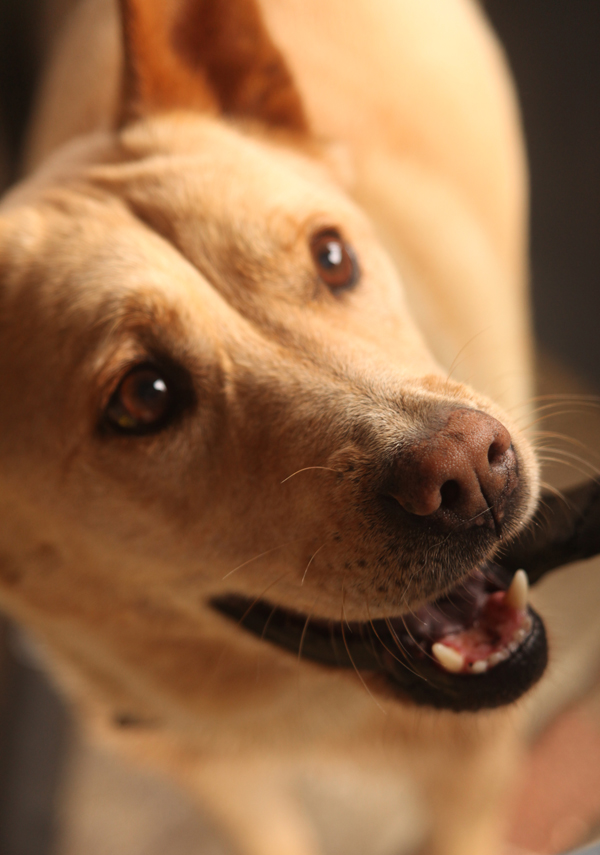
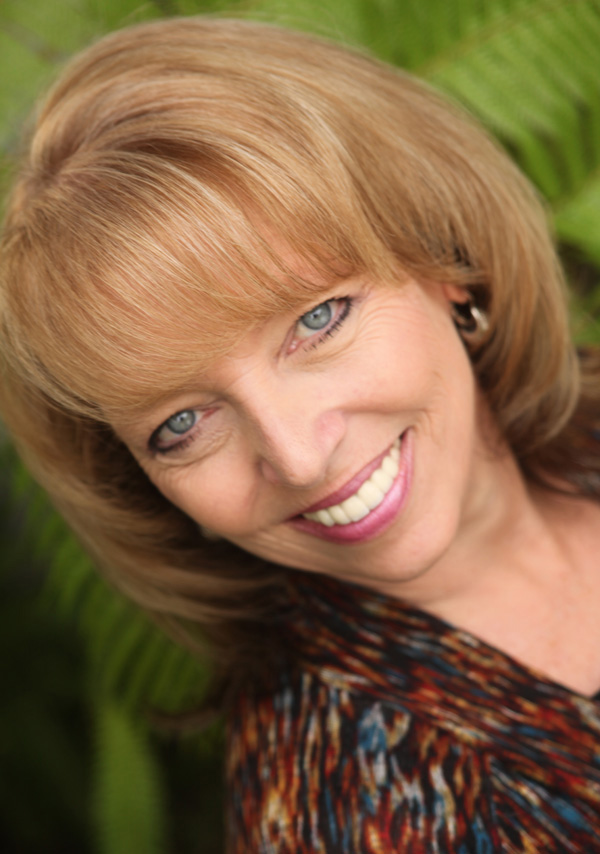
Portraits: only the dog's nose is in focus, while the woman's entire face is in focus at f/3.5 Click images to enlarge

Keeping these three depth of field factors of in mind, you should select your lens focal length, distance from the subject, and aperture carefully. When the depth of field is what you want to control (as opposed to motion effects, which are controlled by your camera’s Shutter Priority mode), you should use your camera’s Aperture Priority mode (often abbreviated Av on the shooting modes dial). Here are some general rules of thumb for deciding when to select shallow or great depth of field:

• Use a large aperture and a telephoto focal length for shallow depth of field. Use a wide aperture when photographing portrait and close-up subjects, or any time you want to separate your subject from its background. The apertures between f/1.4 (or whatever your maximum aperture is) and about f/5.6 will isolate your subject from its background, particularly when you use a focal length of at least 40mm with most digital cameras.

• Use a small aperture and a wide-angle focal length for great depth of field. Use a small aperture when shooting landscapes, travel scenes, architecture, or whenever you want to show as much detail as possible. You can often get great depth of field with apertures between f/8 and f/11, especially when you’re using a wide-angle lens in the range of about 10mm to 16mm. However, when overall sharpness is critical, use apertures between f/11 and f/32.
Just remember that these guidelines are just generalities. For example, there may be times when you’ll want to shoot pictures of people with a small aperture when you want both your subject and the scenic surroundings to be in focus. Or you may want to zoom in on an interesting seagull with a wide aperture and allow the bay in the background to be blurred.

Controlling DOF with the Basic Scene Modes

Shallow DOF close-up vs Great DOF landscape Click images to enlarge

You can control aperture and shutter settings with practically all digital cameras that accommodate interchangeable lenses, and even with many compact cameras that have built-in lenses. But if you own a point-and-shoot model that doesn’t allow you to control f-stops and shutter speeds, you can utilize your camera’s basic scene modes. For instance, if you want to shoot a portrait and have relatively shallow depth of field, you can use your camera’s Portrait mode (often denoted with a symbol of a woman wearing a hat). Your camera’s Close-up mode (the flower symbol on the shooting mode dial) will allow you to get a little closer to your subject and will limit depth of field as well. For times when you want to get everything in focus near and far, you can select the landscape mode (the mountain symbol on the shooting dial). Today’s compact cameras have a variety of shooting modes too numerous to mention here (as well as most DSLRs). The most important thing is to experiment with your camera’s settings and be creative!

How-To: Getting the Professional Angle

Lynne Eodice

How-To: Getting the Professional Angle

The Extra Perspective That Takes an Image From Amateur to Professional Text and Photos by Lynne Eodice

By changing your camera’s viewpoint, you can create a powerful effect over the visual impact of your images. The same scene can appear very different depending on whether you choose to photograph it from above, below or at eye level. For a little variety, try climbing a few stairs or find an upper-level viewpoint to shoot down on a subject, or squat low or even lie down to angle your camera upward. And don’t think that you have to include the entire scene in your pictures.

Remember that an eye-level angle conveys realism and an everyday appearance of a subject — it’s the way we usually see the world. Most of us tend to spot and shoot subjects from an eye-level, straight ahead point of view. We look down at wildflowers, out at the ocean, and up at the sky. Sometimes, in order to create interesting, more original images, you’ll want to alter this viewpoint.

From Above

When a scene is photographed from above, the organization of elements in the picture becomes clearer, as with this scene of a garden photographed from a high vantage point. You can reveal patterns from a high angle of view, or emphasize a subject’s diminutive size. High angles are intriguing because in addition to revealing hidden design qualities in commonplace settings, they heighten the two-dimensional aspects of a scene.

It’s easy to locate high vantage points. Rooftops, bridges, upper-floor windows, and staircases are all good possibilities. When you point the camera down from a high angle, the horizon is near the top of the photo (if it’s visible at all), and the land seems to stretch away endlessly.

From Below

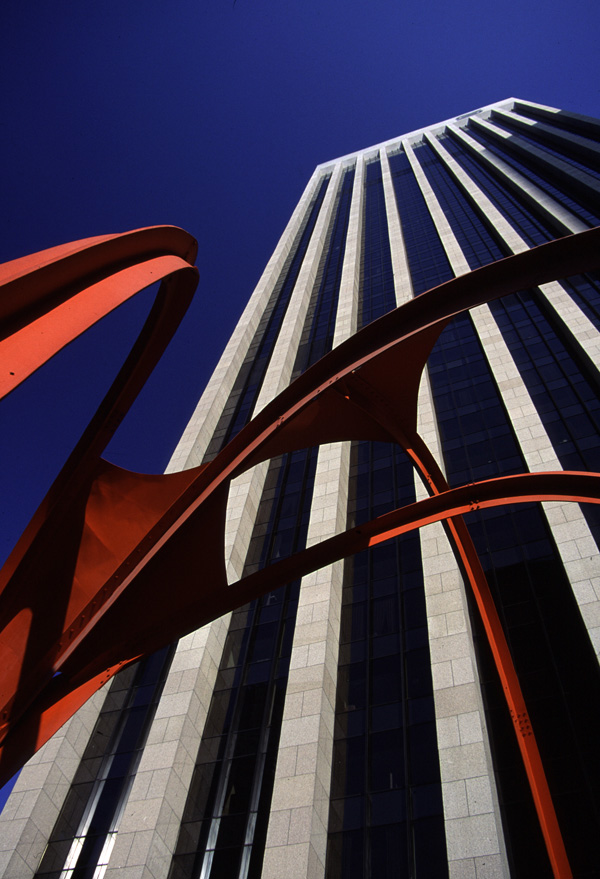
When you photograph a landscape from a low angle, the horizon in the photo moves downward, showing an expanse of sky, and emphasizing the expanse of the landscape. Low angles can exaggerate the height of tall subjects, like skyscrapers in a city, or even reveal overlooked features of low-lying objects.

This is especially true when you combine a close viewpoint and the reality-stretching effects of a wide-angle lens. If I had photographed this high-rise building in Downtown Los Angeles from a distance, or even from a somewhat higher vantage point, it might appear less interesting. But I moved up close to the base of a red metal sculpture in front of this building with a 20mm lens and shot straight up to emphasize the appearance of a soaring tower, and to accentuate the red, white and blue colors in this scene. A small aperture of f/11 gave me great depth of field.

Framing

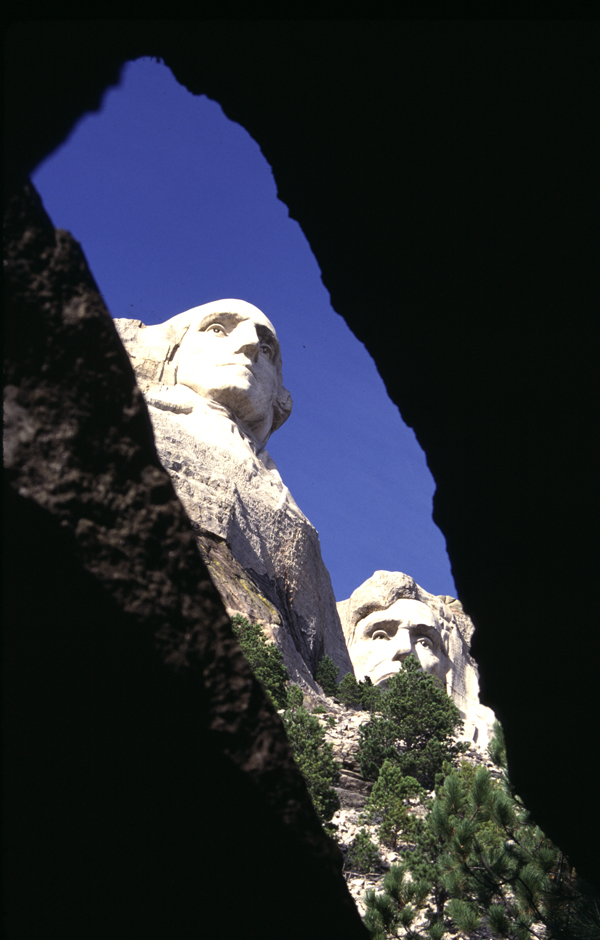
Shooting an object through a framing element can give you an interesting perspective, as well as a very original point of view. For example, after photographing the typical views of the famous monument at Mount Rushmore, I took a short nature trail and discovered a rocky crevice from which I shot a more original view of this frequently photographed icon. This image has been published several times, including as an illustration in an airline magazine feature story about the attractions of South Dakota—all because it stood out from the rest.

Trees, a window, doorway, or even a rocky crevice can create a visual frame within the picture’s actual frame when positioned around an object. In addition to directing the viewer’s eye toward your subject, a framing element can serve to obscure distracting details in a scene. At the same time, a framing device can create a sense of depth in an image and help to identify its setting. It’s important to make sure your subject is in sharp focus when using a visual frame, and a small aperture of f/11 or smaller can ensure overall image sharpness.

Shoot Only a Portion of a Scene

Oftentimes we’re so intent on viewing only the whole object or the entire scene that we ignore design elements that make up the larger view. When looking for interesting angles from which to shoot, learn to simplify your images by identifying the designs hidden within them.

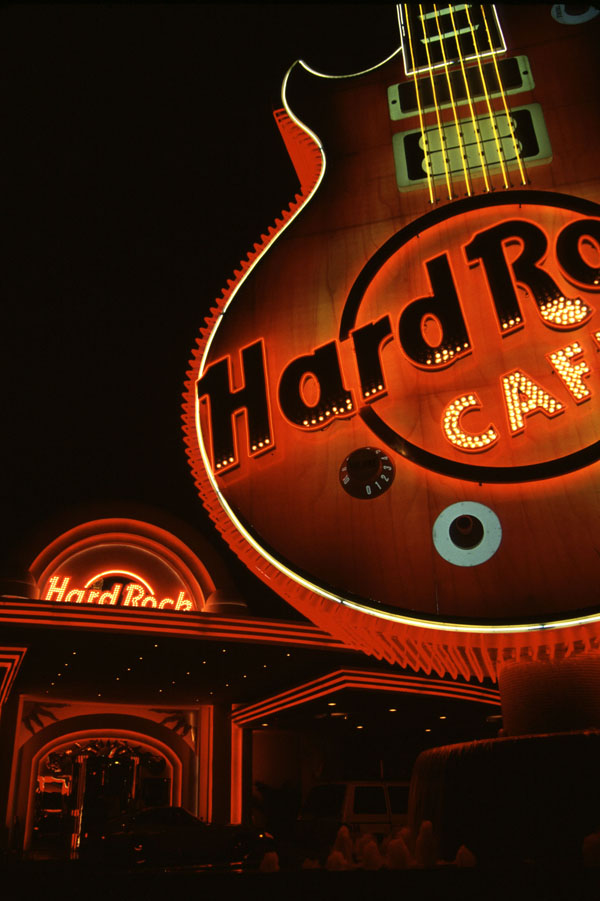
By shooting upwards from a low vantage point and including just a portion of this sign in the shape of a guitar, my goal was to capture the excitement of lights at night and the feeling of being in the midst of nightlife in Las Vegas. The red lights against the dark sky provide a dramatic contrast. To photograph this scene, I used a 24mm setting on my zoom lens and a small aperture of f/8 to give me great depth of field.  A good way to spot the design possibilities within a scene is to isolate and frame them by zooming your lens until you find a pleasing composition. Once you uncover a photogenic design, study the arrangement of the key elements within the frame.

In Conclusion

Even when you don’t have a camera handy, take the time to study a subject from a high or low angle, or even through a framing element. Try to notice single colors or dramatic contrasts, abstract shapes, patterns of texture, and interesting portions of a larger scene. By purposely looking at the world from a different perspective, you can take your images to the professional level!

How-To: Photographing Animals

Lynne Eodice

How-To: Photographing Animals at Home and in the Wild Text and Photos by Lynne Eodice

If you’re like me—a photographer who is also an animal lover—chances are, your furry four-legged friends are among your favorite subjects. But photographing animals, whether it’s your pet dog or a zebra at the zoo, requires patience, good timing and skill. It’s difficult to pose them (in some cases, impossible), and they won’t sit still for long.

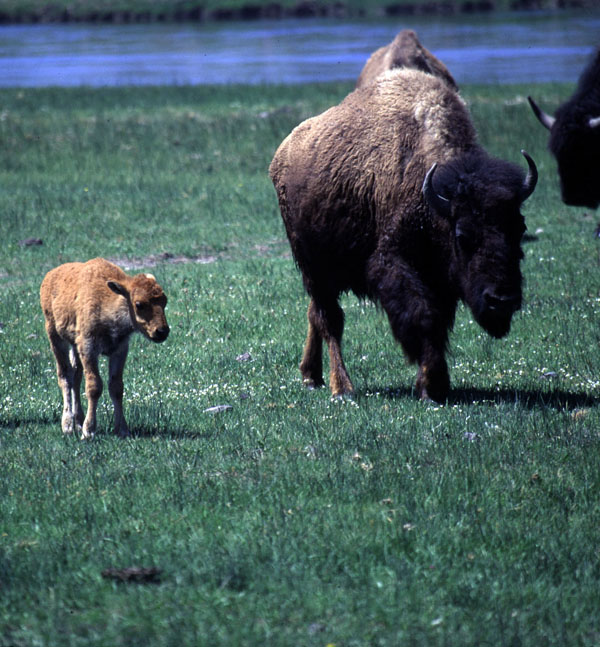
The first thing you will want to decide is what you want to portray about the animal you’re photographing. Is it the graceful beauty of a cat, the protective nature of a mother bison with her calf, or the energy of your dog running on the beach? The good news is that you probably won’t have to travel to exotic locales to find good photo opportunities. Animal subjects can be found as close as your own backyard or the local zoo.

Pets: Lighting, Action and Angles

Photos captured of pets click the thumbnails to see full-size images

If you’re photographing your own pet, you probably know its personality pretty well and can anticipate how it will act in different situations. Once you’ve decided when and where you’d like to take pictures of Fifi or Fido, think about the lighting and where you should be to capture certain behavior. For example, if your cat typically lies down in a particular part of the room, consider using a high ISO setting (like 400 or faster), to capture your cat in a low-light setting. To add more light, use a little fill-flash, or even bounce a little light off the ceiling.

Many of your best images of pets will be from their level, which often means lying on the floor or the ground. It’s the best way to capture their expressions, and it conveys something of what the world is like at their level. And get close, either physically or with a moderate telephoto lens. If your pet is well trained, you might be able to get him/her to sit or lie down in a photogenic spot of your choosing. And don’t forget—a cooperative pet should always be rewarded with a tasty treat. Make the photo session one that’s enjoyable for all involved, as you would with a human’s portrait session.

If you want to freeze the motion of a fast-moving animal, put your camera on its shutter-priority mode and select a fast shutter speed like 1/500 or faster. Shoot portraits as well as behavioral images, and be sure to take some pictures that show the pet’s relationship with different members of the family. These photos will bring back fond memories for years to come.

Zoos & Sanctuaries: Close-ups in Confinement

There are a wide variety of places in which wildlife can be found—and many are very close to home. For example, in addition to having a wonderful zoo, San Diego, California also has the Wild Animal Park, in which visitors can view wildlife in a natural, authentic looking habitat from a tram that travels throughout the park. Want to go on safari without leaving the U.S.? Orlando, Florida, has a Disney theme park called Animal Kingdom, in which animals can be viewed in spacious, African Serengeti-like plains. Zoos, and animal sanctuaries offer the opportunity to view the greatest variety of wildlife in a relatively small radius.

There are several ways to approach animal photography in these settings. You can take portraits or other tight shots of the animals, or capture wider views that show the environments in which the animals are confined. If close portraits are what you’re after, try to get as tight a shot as you can and blur the background with a wide aperture, since it’s not a native habitat for the animal.  Use a long telephoto lens (80mm – 300mm work well with most DSLRs), or a shorter one with a teleconverter. To show an animal in its enclosure, stand back and use a wide-angle lens (around 10mm – 24mm).

The good news is that most zoos and animal sanctuaries don’t have restrictions on photography, so you’ll probably be able to use a tripod or monopod—a necessity with most long lenses.

Into the Wild: Time and Telephoto Lenses

Photos captured of animals in wild animal parks click the thumbnails to see full-size images

National parks and game preserves offer spectacular glimpses of the animal world. Many parks have displays and brochures about their wildlife that offer great tips. The Internet and books can also give you a lot of information on what to look for. Talk to park rangers, as they usually know various animals’ hangouts and habits. Learn as much as possible about their behavior patterns, such as their feeding and nesting habits and their modes of defense.

As a general rule, most animals venture out early in the morning or late in the afternoon, rather than at midday. And like portraits of people, close-ups of animals will be the most flattering when the illumination is the soft light of an overcast day. Early or late afternoon light can be very dramatic as well. The low light of morning or afternoon can emphasize an animal’s contours and the texture of its fur or feathers. In daylight, you should be able to use a fast shutter speed (1/250 second or faster) that’s necessary to capture a moving subject. If possible, set your camera up on a tripod in a location that gives you clear visibility, and a safe distance from danger.

Photos captured of animals in wild animal parks click the thumbnails to see full-size images

Many wildlife parks will only allow shooting from the safety of your automobile, so you’ll want to use a long telephoto lens (200mm or longer) to bring wildlife subjects in close. Take caution when shooting in the wild, and always maintain a safe distance. During particular seasons, even deer have been known to attack.

In places like Yellowstone National Park in Wyoming, wildlife may be more accustomed to human visitors. Bison are very commonplace, in addition to deer and elk. In any case, a long telephoto lens, patience, and a little luck all play a role in photographing animals in the wild. Taking pictures of wild animals takes a lot of time, and you must be as unobtrusive as possible. The animals should be unaware or at least undisturbed by your presence so that you can photograph their natural behavior.

Whether you photograph animals at the neighborhood dog park, the local zoo, or at a National Park, you’ll find that this can be a very rewarding and educational experience!

How-To: Options for Close-Up & Macro Shooting

digital photographer

How-To: Options for Close-Up & Macro Shooting Text and Photos by Lynne Eodice

There is a small, intimate world that most people overlook, but it can be a rewarding experience for the photographer who chooses to explore it with a good close-up or macro lens (like the above photo of lavender). All you need is patience, a good eye, and a special piece of equipment or two.

Options

There are several ways to shoot close-ups with your DSLR: with the close-up setting on your camera, a macro lens, extension tubes or bellows, or a close-up “lens” that attaches to the front of your lens like a filter. Although the close-up lens/filter is the least expensive option, it is inferior optically to a true macro lens or extension tubes or bellows.

The Close-Up Setting

Photos captured with the DSLR's Close-up setting click the thumbnails to see full-size images

Aside from some professional-level camera models that don’t offer basic shooting modes, most DSLRs include a close-up setting on their picture mode dials. This close-up setting is designated by a flower symbol. You can use this setting with a variety of lenses (the long end of a telephoto zoom works best), and you’ll need to check the lens for its minimum focusing distance. The lens’s minimum focusing distance is measured from the focal plane mark on the camera to the subject. If you get too close, the focusing light will often blink and you may not be able to press the shutter button to shoot the picture.

The close-up setting on your camera will allow you to get somewhat close to your subject (perhaps two to three feet), but the serious close-up photographer will want to invest in a true macro lens, extension tubes, or bellows.

Macro Lenses

Photo captured with a Macro lens

Some macro lenses have 1:1 magnification and render a subject as a life-size image, while others produce an image that’s about half the size of subject. For most close-up subjects—flowers, insects, coins, insects, etc.—this magnification works great. Many macro lenses are 50mm or 60mm, although longer lenses in the 100mm to 200mm range are also available from major lens manufacturers. Some zoom lenses have a macro function, making close-up work possible over a variety of focal lengths. And because these lenses often focus to infinity, they offer the versatility of shooting other subjects as well. When shooting close-ups, you must be especially careful in focusing because depth of field is very shallow. This selective focusing isn’t a bad thing, since a soft blurring of the foreground and/or background can make the sharp aspect of a subject stand out. If your subject has some depth — e.g., a flower or an insect—you will need to decide which portion of it you want to be in sharp focus. And because your focusing is so critical and any movement may be exaggerated, it’s best to use a tripod and cable release for best results.

The macro lens is by far the best choice of close-up gear for those photographers who are serious about doing making extreme magnifications of a subject. A quality macro lens can be a costly item, but is well worth the investment in the long run.

Extension Tubes & Bellows

Photo captured with an extension tube

Both are hollow devices that fit between your camera body and lens to extend the positioning of the lens and increase its magnifying power. Extension tubes are available in a variety of fixed lengths to give you different magnifications, and most camera manufacturers create models that couple the lens with your camera’s exposure system. Thus, the bigger the tube, the closer your focusing capability. Extension tubes can be used with many different lenses, with the exception of fish-eye or other very wide-angle lenses. Extension bellows work in much the same way as extension tubes, but the magnification is variable, as opposed to an extension tube, which has a fixed magnification. But because neither tubes nor bellows will allow the lens to focus to infinity, you must remove them to do other types of photography.

Extension tubes and bellows are less-expensive alternatives to macro lenses and offer greater close-up options than do the close-up mode on your camera’s basic mode dial. They also give you better quality optics than the close-up lens/filter.

In Conclusion

If you’ve viewed some serious macro photography—like a life-size view of a spider’s head—you know how fascinating this world can be. If this is the case, perhaps a macro lens is high on your wish list. On the other hand, if you simply want to shoot an occasional close-up or a portion of a larger composition, then consider using the close-up mode on your camera or even getting a close-up filter. There’s a whole world of close-up subjects out there, ranging from several feet to just inches away, and all of them can result in great shots—depending on how you want to portray them.

5 Tips for the Brand Conscious Photographer-- from DigiLabs

digital photographer

image © Roger Schultz (creative commons)

The DigiLabs blog recently featured an essay on branding, which was filled with thoughtful tips for maximizing your "brand" as a photographer. They talked about being consistent, being visible, telling your story, minding your reputation and advertising. My favorite tips are below. Click here to see the whole story by DigiLabs.

Be Consistent: ...Since for most photographers, their website is their branding environment---take care of it. Make sure your website reflects recent work and communicates to the client that you are most likely to appeal to. While design is very important for visual appeal, make sure your copy, user interface and navigation, load times, and links convey your brand and message. Also make sure that your website and anything linked to it (shopping cart, slideshows, blog) maintain an easy and consistent user experience, this way, you will impress instead of overwhelm visitors.

What is Your Story? With 120,000 new photographers entering the market last year, you need to have a unique story. People love stories. They are interesting, engaging, and easy to remember and associate a brand with. People especially like Cinderella story.   For example, Apple started from 2 determined people in a garage and today is a leader in technology and design. This story makes us feel inspired.  Tell your client a story which is consistent with your message and represents your brand.  Are you an artist? A sucker for love? A family man? A mother of three? A commercial photographer? Are you a photojournalist? A fashion photographer? Who you are will help you set yourself apart from the others and build your brand.

Tips for Shooting Sports and Action from Olympus

digital photographer

Summer is officially upon us (whether or not the weather is cooperating), and summer usually means action: camping, outdoor sports, running around on the seashore. So, its great timing that Olympus is sharing some excellent photography tips for capturing sports and moving subjects. My favorite tip is below. Click here to see the whole story by Olympus.

Be Prepared

To get good results of fast moving subjects, you have to be ready in advance---even when you’re using Sequential Shooting. A very short delay, called shutter-lag, can occur between the moment you press the shutter button and the first picture in the sequence is taken. To take a picture perfectly timed to your subject’s movement, take this into consideration and press the shutter button slightly in advance.

image via Olympus

National Geographic's Ultimate Field Guide to Travel Photography

digital photographer

© Peter McBride, courtesy National Geographic Books

The new book "National Geographic: Ultimate Guide to Travel Photography" recently came across my desk, and I have to say I am impressed with how much helpful information author Scott S. Stuckey has packed into the pint-sized edition. It's ripe with tips that wouuld be relevant to both pros and those just getting started in the field. Most of the tips even translate to amateur photographers who just want to get the most out of a travel experience, even if they don't plan to sell their photos afterward. Some of my favorite tips are below. The book is available at the National Geographic online store.

Show Respect and Honest Appreciation

"'To be a great photojournalist,' says Justin Guariglia, 'you have to love people, to care about the culture you're shooting. Your sincerity and respect will help you to understand what you're trying to photograph---and will be obvious to the locals. As you absorb the culture, you become part of it. And that is reflected in your photography.'" (pg. 56) Image © Catherine Karnow, courtesy National Geographic Books.

Shoot Verticals Too

"Landscapes are wide and horizontal, but don't forget to shoot vertical compositions of them. Professional photographers shooting for magazines know that many, if not most, of the pictures that get published will be verticals, filling one page or less than a page. Horizontal images covering two full pages ---the coveted 'double truck'---are the exception rather than the rule." (pg. 133) Image © Jim Richardson, courtesy National Geographic Books.

How-To: Shooting in Existing Light

digital photographer

Bellagio_OutdoorNight

How-To: Shooting in Existing Light Text and Photos by Lynne Eodice

Some of the best photo opportunities present themselves in situations that would appear to pose lighting challenges, such as outdoors at dusk or dawn, or indoors with window light or artificial illumination. This how-to story provides tips on meeting these challenges without using flash.

Dusk and Dawn

Pas_OutdoorNight

For a half-hour to an hour before the sun rises and after it sets, the sky is filled with soft, beautiful light that has inspired the term magic hour among photographers. Beginning with the first faint light of daybreak, colors in the sky brighten quickly---from cool blue tones to soft pastel shades, and finally, the warm tones preceding sunrise. After sunset, this process takes place again in reverse.

Because you have such a slim window of time in which to shoot, it’s best to scout out a scene that you want to photograph ahead of time. During the shoot, you’ll want to use a tripod (or plan to use a fast ISO setting like 800 or greater if a tripod is not available). You should also use a small aperture like f/8 or f/11 for great depth of field. Check your exposure readings frequently. The darker the scene, the more important it is to bracket your exposures. Long time exposures of several seconds are very likely once the sun goes down.

Dusk is a great time to photograph city skylines. You’ll still have some exciting color in the sky, and the lights from street lamps and buildings will also contribute to creating a truly dramatic photograph. An extra bonus is that if you’re using a very small aperture, like f/11, f/13, or f/16, small points of light in the scene (like street lights) may resemble multi-pointed stars.

Natural Light Indoors

GageHotel_LightComingThruWindows

Occasions may arise in which you’ll want to shoot indoors, but aren’t permitted to use flash because of certain restrictions; i.e., weddings in chapels, art galleries, and other public buildings. When shooting indoors with natural light that comes in from outside, use windows or doors that get reflected light from the sky. This light will be directional, but softer and not as intense. Diffused window light may provide flattering illumination when photographing people. If you’re not using flash, you’ll probably need to use a higher ISO reading like 800 or 1600.

Laura_WindowLight

If there is a lot of bright light coming in through a window or doorway, you can reduce this contrast by using a secondary source of light, like some sort of reflective material. You can use white poster board, Fome-Cor board (both are available at art supply stores), or a commercial reflector (from your local camera store) to bounce light back into shadowy areas of a person’s face. Whenever possible, you can open a door or curtains to let light in from another direction to fill in shadows.

Your camera’s meter is often fooled by bright areas of direct light from a window, so you may want to switch to your camera’s spot metering mode to get a more accurate reading. Take your spot meter reading from an important part of the scene---like a person’s face or mid-tone object. Use your camera’s exposure-lock feature to hold that reading.

Artificial Indoor Light

Indoors_ArtificialLight

Taking pictures with ambient indoor light can be challenging. First of all, you may want to change your Auto White Balance (AWB) setting to match the main light source. Some indoor artificial lighting requires that you switch your White Balance setting to a tungsten setting to correct for incandescent lighting. (But if you like the warm cast created by this light source, use your camera’s AWB setting.)

To photograph a person in a public place, try to position him/her in a place with even indoor lighting, or surround the individual with bright, reflective surfaces. If you’re photographing a subject next to candlelight, the person may appear warmer than he/she would with tungsten lighting. When photographing performers on a stage, you’ll have the challenge of bright lighting on the person or group against a dark background. Use a telephoto lens to bring the performer in closer and switch to your camera’s spot-metering mode to get a reading from the person’s face or clothing.

In a Nutshell:

Dusk or Dawn •    Scout out your scene ahead of time •    Use a tripod for best results •    Photograph the lights of the city balanced with the color of the sky

Natural Light Indoors •     Shoot with reflected light coming in from outdoors •     Use a reflective material to fill in shadows •     Use your camera’s spot-metering feature

Artificial Light Indoors •     Adjust your White Balance setting to match the light source •     Photograph a person in a place that’s evenly lit •     Use a telephoto lens to bring stage performers in close

1-Minute D-SLR Know-How Videos from Tamron

digital photographer

Tamron_DSLRKnow-How Starting today, optics company, Tamron, is beginning a new video learning series. The "DSLR Know-How" videos will air on Tamron's YouTube channel every Monday for 12 weeks. The videos are geared toward first-time Digital SLR owners, according to Tamron, but are "also likely to appeal to a broad spectrum of shooters including experienced enthusiasts, and those who simply want to get a better handle on all the exciting features built into their new Digital SLR cameras."  Episode One, which was released today, features professional photographer, Andre Costantini, giving a very brief overview of the "physics of photography"---a capture device, shutter and aperture. While this first episode was not very in-depth in terms of tips, I suspect those that follow will be, now that they've gotten that introduction out of the way.

The Best of 2009- Photography Tips

digital photographer

c2a9allisongibson2 - Tip from a Pro: Professional photographer, Larry Lytle, gives an in-depth tutorial on using studio lighting.

- Winter shooting tips from Olympus photographer, Jay Kinghorn.

- DP's tips and insights on photographing children in a developing country.

- Tips for brilliant photos of fireworks from Olympus.

- Tips for capturing the colors of Autumn.

- Tips from a travel photographer- from the New York Times.

We also had a lot of helpful how-to tips in the magazine this year, including tips for: Producing High Dynamic Range (HDR) photos, capturing the essence of winter scenes, and ten things to avoid when shooting---in the Digital Photographer winter 2009 issue; understanding the basics of resolution, image quality and zoom---in the Digital Photographer spring 2009 issue; shooting photos underwater---in the Digital Photographer summer 2009 issue; and photographing cemeteries and shooting in low-light---in the Digital Photographer fall 2009 issue.